Pumper Overview
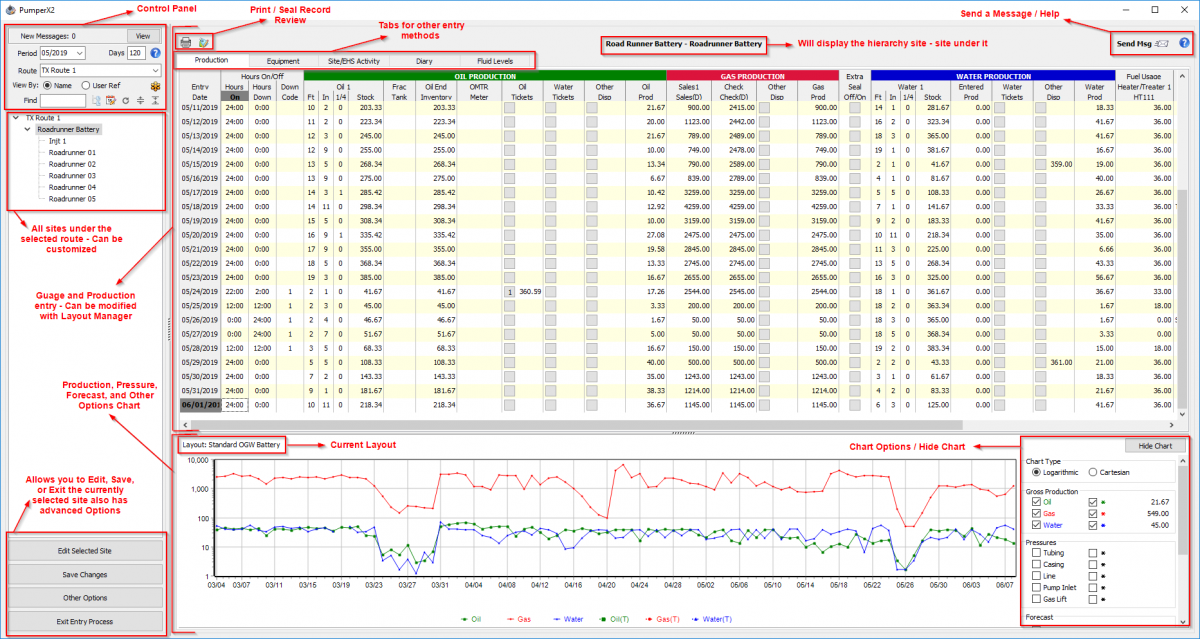
The main screen of PumperX2 will show when 'Start Entry' from the previous screen when the app is launched. This scene will be where the work is done and allow you to view data that has been entered.
◄ PumperX2
Contents
Control Panel
Some of the following features are not availible in offline mode and have to be done another way.
Messages
This section mainly controls behavior of the data presented in the list along with other options in the form of buttons.
The first part will show if you have any available messages from anyone set up in Analyst, this will be highlighted yellow for new messages.
Once open you can select the message from the sender and read, reply, or forward it. Messages cannot be deleted.
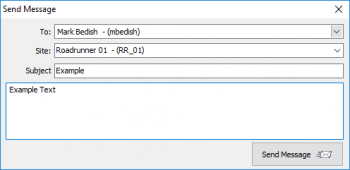
You can also send a message by using the far right symbol next to help on the main screen. You can also view messages on Analyst or Insight Cards.
Site List and Options
To control the list, select a period. If you select the current month it will show as many days as you have set back or how many days you are allowed to view/edit in the permissions under User Maintenance in Analyst.
Next select the route from the drop-down. If you do not see this contact your Analyst to have them assign it to you.
You can view the sites by the User_ref (Name your company uses) or Name (Official Reg name). If you have many wells you can find it in the find box and it will highlight it grey then you can select the well by double clicking.
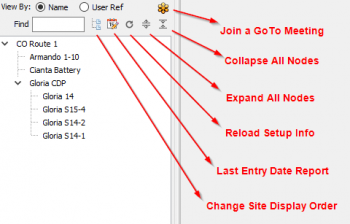
The buttons in the control panel are shown here:
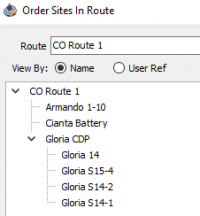
Change Site Display Order
Will open a new window allowing you to click and drag the sites to a custom order. Sites can also be placed into other sites such as a battery with wells.
If the route changes are not ideal you can reset to the original layout.
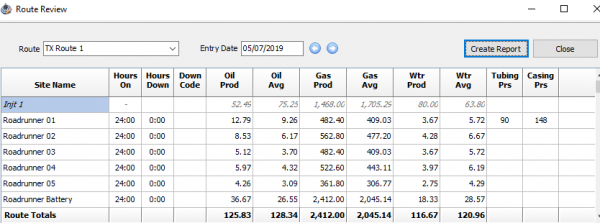
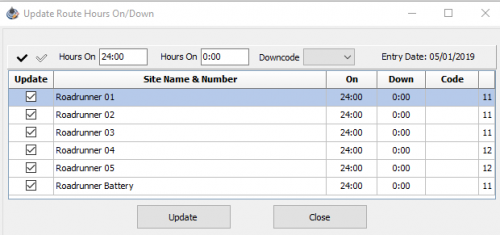
Last Entry Date Report
Select one of the three options:
Reload Setup Info / Expand Nodes
Selecting the reload symbol will pull in any new changes made outside of the open Pumper program. It is the same as closing and reopening the program. Use this to pull in any layout changes or changes to routes.
If using offline entry, save any changes and sync your data, then reset data to pull down new changes.
Nodes - The last two buttons in the row are to open or close the set ups from the previous 'Change Site Display Order' selection. If you have multiple batteries with wells embedded into it you can close all the batteries at once or open them all at once.
GoTo Meeting
The orange icon is to go to a GoTo Meeting which allows a representative of prams to connect to your PC with a code and help solve an issue.
To learn more click here
Other Options
Below the list of sites there are four buttons:
- Edit Selected Site - If you select a site by clicking once you can then select this button and it will open the site for editing.
- Save Changes - Once you have all your changes made to the records, you can select this button to save that data. Alternatively you can select another well prompting a save changes window.
- Exit Entry Process - Selecting this button will close out of pumper if in direct mode and if in offline entry it will take you back to the synchronize screen.
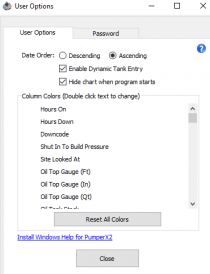
- Other Options - This button will open the following menu where you can change the way the date shows on the entry screen by ascending or descending.
Enable Dynamic Tank Entry that auto shortens the gauges if you have more than three. When you select the gauge it will open up for entry. This is used to save space on the screen especially with Color-cut tanks.
There is a check-mark box that will allow you to auto hide the chart at the bottom if it is in the way rather than hiding it each time.
You can also add colors to your columns signifying the most important entries or show some one which column need to be entered. These can be reset if need be.
Lastly the Password tab will allow you to change your password if you were given permission to do so.
Data Entry
Production Tab
This screen allows you to enter in the data captured from the tanks, meters, tubing and casing, leave remarks for the day and many other possibilities.
Every site in PumperX2 is controlled by a 'Layout' as displayed in the bottom left of the entry panel. This controls the columns displayed, a layout can be defined in Analyst under Admin > PumperX2 Layout Manger.
Certian options in this list can add in large sections such as 'Equipment' depending on how it was set up. Normally equeptment has it own tab but can be modifyed to appear in the main entry screen.
Data can be entered in multiple ways. When you first click on a site it will take you to the next blank row of data that needs to be entered. Most first columns are Hours On and when the data is entered just select enter on the keyboard. This will move you right to the next column.
Rather than enter in all the data one by one, shortcuts have been added for situations.
- "F5" - Will bring down all the previous days data from the tank gauges. This will only work if there is no other data past the row you want to enter data on. A great option for a shut in status.
- "F6" - Will bring down the previous days meter entry. This is useful for a meter reading that doesn't change much.
- "F9" - Will change the way data is entered going from left->right to Top->Bottom entry when you are in a cell and select enter.
If you find you are entering data and its not allowing you to enter in data for a day in the past but will allow for current day forward check with your Analyst to make sure that the well can be entered in for the time period.
If there is downtime there is a reason and a down-code must be displayed as well as a remark entered for the day before you can save. The down-codes can be edited in Analyst under Tools > Downcode Maintenance.
Inspections
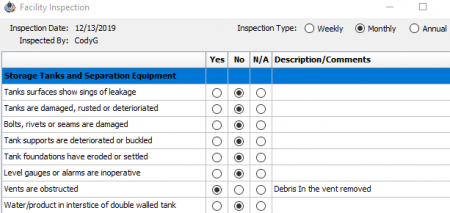
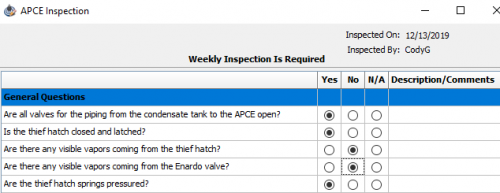
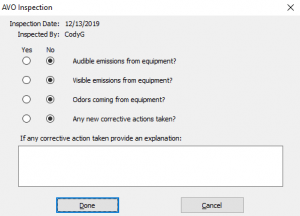
Facility Inspection, APCE Reporting, and AVO Inspections can also be entered into pumper. They will all have their own default question but can be edited in Analyst under Tools > EHS Site Activity Definitions, Facility Inspection Set Up, and APCE Inspection Setup. The amount of questions and weather or not a remark is required can be controlled from these setting.
The reports can be done Weekly, Monthly, or Annually. For radio buttons you can select yes or no and then using the arrows to move to the next, you can hit space bar to fill in the circle.
Oil Ticket Entry
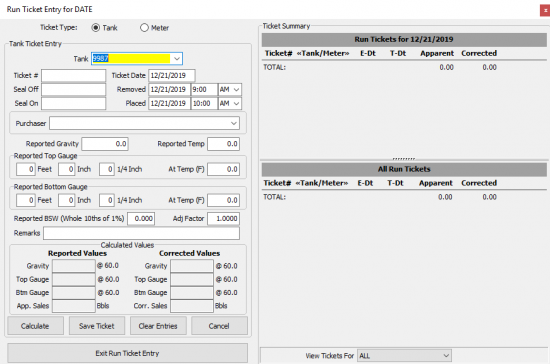
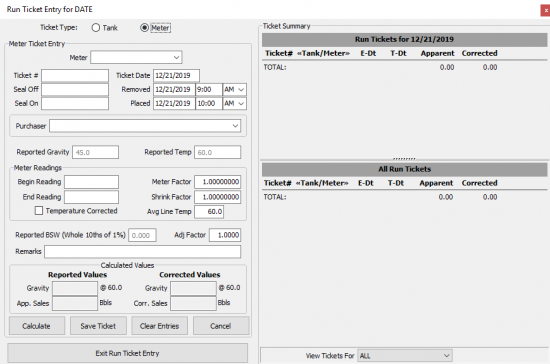
To enter an oil ticket click the box  for the day you want to enter in and the following screen will appear:
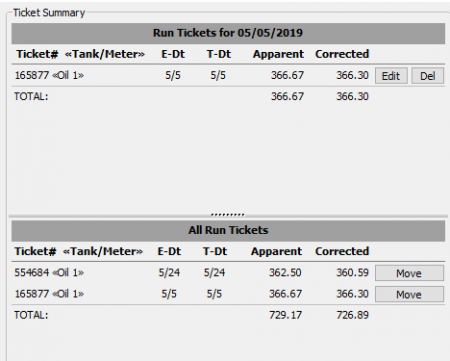
| Tank ticket entry is the default screen: | If you select the meter radio button you will see the following screen: | When you have the information entered the finalized ticket will appear to the right: |
Once a ticket has been entered you can always edit the ticket by selecting the edit button next to it. Alternatively you can delete out the ticket if need be.
Moving a ticket from the "All Run Tickets" section will move any of the other tickets for the month to the current day you are on.
Example being that if you needed to move a ticket from the 10th to the 5th of the month, you would go into ticket entry on the 5th and find the ticket on the 10th under all run tickets and click move. It will ask if you are sure, click ok and you will now see the ticket has moved days.
Important Note! Due to Prams running from the 2nd to the first of the new month tickets can appear to be missing if placed on the 1st. You do not want to move the ticket but instead change the "Ticket Date" so that the monthly reporting can see it for part of the current month rather than the next. This will not change gauges as the ticket date is only for reporting purposes.
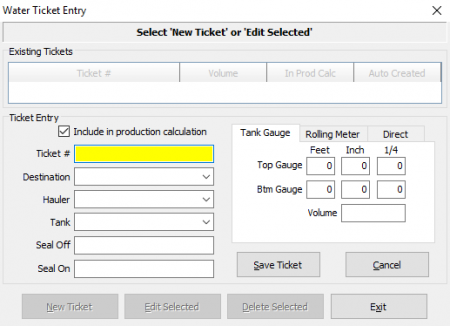
Water Ticket Entry
Equipment Tab
| In order for this tab to appear Equipment needs to be set up on the well. To learn how to set up equipment in Analyst click here
The equipment tab can be brought into the Production Tab with the other readings by adding 'Equipment Entry' in PumperX2 Layout Manager. Many different options are available to customize with this tab in Analyst. |
Site and EHS Activity Tab
|
This tab will allow you to enter in data for EHS or SITE activity type. These can be defined in Analyst by going to Tools > EHS Site Activity Definitions. On the far bottom right of the pane there will be a button called 'Add Activity' use this to add in a new type and if you want to delete the activity you can select anywhere in the row and press 'Remove Activity' in the far bottom right. |
Dairy Tab
In this tab you can document events that a a remark or note cannot cover.
To add a new log to the Diary, type in the bottom black space and then click submit. This will mark the date and time and will always be visible in the Site Maintenance Tab in Analyst.
To delete the diary record select the X to the far right of the comment.
Fluid Level Tab
This tab is to track the fluid levels by adding a record on the bottom left, To remove select the row you want and click 'Remove Record' on the bottom right.
As new records are added S.N. Depth, Top & Bottom Perf, and Datum will be carried forward.
More deatal can be seen in the analyst section here.
The available columns are:
| S.N. Depth (FT) | Seating nipple depth in feet. |
| Top Perf (FT) | Top perforation in feet. |
| Btm Perf (FT) | Bottom perforation in feet. |
| Datum (FT) | Elevation of wellhead in feet. |
| Fluid Level (FT) | Fluid level in feet. |
| C/P BU (PSI/MIN) | Casing pressure build up. |
| CP (PSI) | Casing pressure |
| FAP (FT) | Fluid above pump in feet. |
| GF (FT) | Gas free fluid above pump. |
| FAP Change (FT) | Change in gas free fluid above pump since last time well was shot. |
| PIP (PSI) | Pump inlet pressure. |
| PHBP (PSI) | Pump bottom hole pressure. |
| GAS RATE MD | Calculated gas rate. |
| RUN TIME (%) | Well run time in minutes. |
| Remarks | Shooter comments. |
Chart
The chart can be auto hidden by going to Other Options and checking 'Hide chart when program starts'. Alternatively you can select 'Hide Chart' to temporarily hide the data.
This will show you the trends in the data, if you every see that the lines are not connecting, the data is missing.
As the cursor hovers over the data, under the Gross Production panel the products will display for the date.
Other items can be added into the charts and will be remembered each time you go into the site.
To see the forecast select it from the drop-down. To add a forecast in Analyst under Site Maintenance Click Here
Copyright © 2026 by PRAMS Plus LLC. All Rights Reserved.
