Difference between revisions of "Site Maintenance"
(→Site Tabs) |
|||
| Line 83: | Line 83: | ||
---- | ---- | ||
{| class="wikitable" | {| class="wikitable" | ||
| − | !====colspan="6" | + | !====colspan="6"====|General |
|- | |- | ||
|User Ref | |User Ref | ||
Revision as of 14:02, 7 June 2019
Contents
Vewing and Adding Sites
|
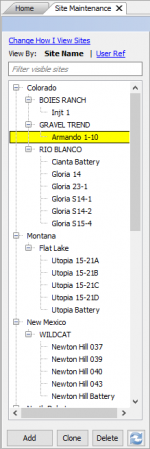
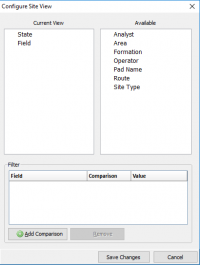
As sites are created they will be stored in a tree view to the left. When you first enter site maintenance the tree view will be blank. To add a site see Adding a Site, to clone an existing site see Cloning a Site, to delete an existing site see Deleting a Site. Click on a Site to view/edit. Clicking on another Site displays the new Site in the same relative screen position. If a change was made the 'Save changes to site?' prompt will display prior to moving to the new Site. This navigation enables quick review of Site information in a focused manner. Selecting Change How I View Sites will open the Configure Site View window: The default layout will be displayed in State\Field order. To select an available option click and drag it to the current view box. There is also an option to Add a Comparison from a field drop-down list that will use a comparison, of 'equals' (=) or 'not-equal'(<>), to any given value. |
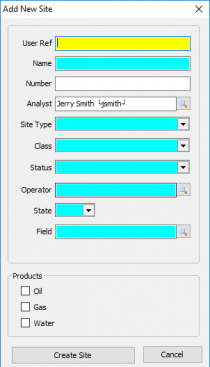
Adding a SiteTo add a site select the Add button under the tree view. This will bring up the window to the left and required the following inputs.
|
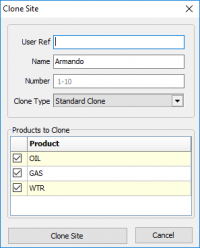
Cloning a SiteTo Clone a Site, select the Site to be cloned and click Clone. The following window displays:
Cloning to a disposal site will bring over all the same info but change the Site type, Class, and Status. This can be modified in the General tab. |
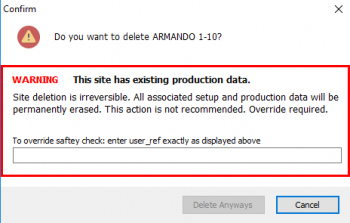
Deleting a SiteTo Delete a site, select the Site and click Delete. The following warning is displayed: If the site has no production behind it it will delete it. If it does you will have to do the override by entering the user_ref. |
Site Tabs
| General | |
|---|---|
| User Ref | A user defined nickname for the Site |
| Name | The Name for the site. Note the Name is used in the regulatory reporting modules when a well or lease name is required. |
| Number | The Number for the Site. Note the Number is used in the regulatory reporting modules when a well number is required. |
| Pad Name | Relates multiple sites to the same physical location. |
| Route | The Pumper Route the site is on. A Route must be assigned to enable data entry in PumperX2. Use the Route editor to maintain Routes. |
| Test Entry | Options are Enabled, Disabled, or Read Only. Enabled allows Test(s) to be entered in PumperX2. Read Only displays the test values (if the column is displayed) for reference in PumperX2. |
| Wellbore Profile | Select Vertical, Horizontal, Directional, or Sidetrack. |
| PumperX2 Layout | Select an available Layout. Layouts control the columns displayed in PumperX2. If a Layout is not defined the default Layout will be used. If a default has not assigned all Columns are displayed. Layouts are maintained in PumperX2 Layout Manager under the Admin menu. |
| Enable Dual Tank Strap (Color Cut) Entry | Check to enable Color-cut (two) gauge entries. The program default behavior is a single gauge per tank per day. |
| Process In Monthly Production | Check to enable Monthly production entry. Only the Sites requiring the Monthly production true up should be checked. |
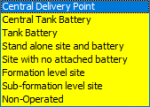
| Site Type | Options are Central Delivery Point, Central Tank Battery, Tank Battery, Standalone site and Battery, Site with no attached Battery, Formation Level Site, Sub-Formation Level Site, and Non-Operated. |
| Class | Oil, Gas, Condensate, or Water. The well's Class does not generally change once it is set up. |
| Status | Select the status from the drop down. Status can change over time during the life of a site. |
| Reporting Dates | These dates control whether a site is included in regulatory and internal reports where indicated. |
| State/County/Field/Formation | Assign the applicable value. State and County are delivered with the software. Field and Formation are maintained by the Client. |
Copyright © 2019 by PRAMS Plus LLC. All Rights Reserved.
