Mass Data Update
Similar to Mass Edit this data update tool is designed to take in file information and apply the info to PRAMS.
◄ Site
In order for this module to work a Excel data file is needed. It is paramount that the Site Identifier data, for the Update Item, be identical to what PRAMS has stored.
The Excel file can contain multiple columns of info, but the module will only look at the first two. The file then can be modified by moving around columns if you have multiple changes to be made.
Prepping the Data File
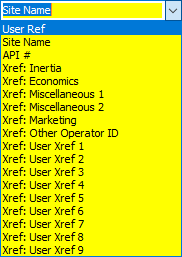
In order to prep the data file for the update the first step is to choose a Site Identifier. It is recommended to chose a consistent variable such as User_Ref, Site Name, or API.
If you have the Site Identifiers place them as the first column in the file that will be used for the update. This will be known later as the Site Xref.
Once you have the first Site Identifier complete, the second column will be the Update Item. This will be the update data that will replace the old data in PRAMS.
Selecting the Data
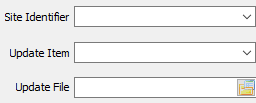
Theses identifiers will be the parameters for the import.
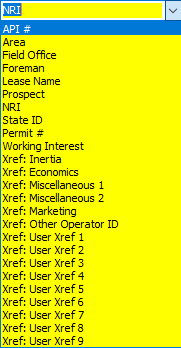
All the choices are displayed to the right. Select them from the drop-down.
The third line is the file browser and will allow you to search for the prepped file. The supported file types are(.xlsx),(.xls), and (csv).
Validation and Update Data
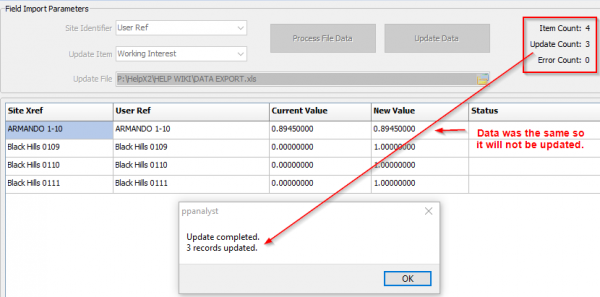
Once the parameters have been established select the Process File Data button. The panal below will display the data chosen along with the current value that is to be changed.
There will also be a pop up that will inform you on the data validation. If there are errors follow the prompt and modify the update file and re-upload.
In the top right corner there will be an Item Count, Update Count, and Error count. If current data has not changed it will not be in the update. Any errors must be fixed before continuing.
Once the validation has passed and there are 0 errors select the Update Data button and the process will start. One complete a pop up will let you know if there were any complications.
Always make sure the data you are updating is correct as this process cannot be undone.
EXAMPLE: Updating existing and missing NRI(Net Revenue Interest) and WI(Working Interest).
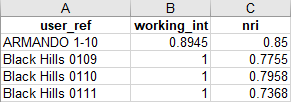
For the Site Identifier, User_Ref will be used and for the Update Item WI will be used then NRI in the third column for the second part.
Using QueryX2 to pull this info for all wells can be done with the following syntax:![]()
This will return all database information in the Site table. This will contain a substantial amount of columns so its recommended to cut and paste from this export.
>Prep the update file by having User_Ref in column one and then WI in column two, then save. Remember the process only looks at two columns at a time.
>On the Mass Data Update module select the Site Identifier as User Ref from the drop-down
>Select Working Interest from the drop-down for Update Item.
>Load the update file that was saved by selecting the folder icon on the third line.
>Process the file Data and check for any issues.
>If there are no issues select update data.
>Once complete modify the update file to show NRI in column two and repeat the process.
Copyright © 2026 by PRAMS Plus LLC. All Rights Reserved.
