Entering Data with PRAMS X2M
This page will show how to enter data by navigating Routes and sites with helpful visual queues to show data already entered.
Accessing Routes
To start entering you need to have at lease one account setup. For more on setup click here.
Synchronizing Data
A major part of PRAMS X2M like with PumperX2 is the synchronization of data and understanding the process to the be able to send data and receive data.
After an account is setup and when you enter the app for the first time you will arrive on the 'PRAMSPlus Accounts' screen.
Select the account you want to use. Keep in mind if multiple accounts have been setup the screens after will only affect the account chosen.
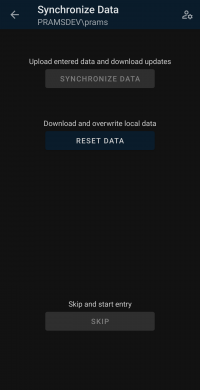
After selecting an account you will be brought to the 'Synchronize Data' screen. At the top just under the page title the account information will be displayed.
If this is the first time syncing data all other buttons but 'Reset Data' will be greyed out to signifying that there is no database to enter data on.
When selected it will pull down the most current information on the companies main database.
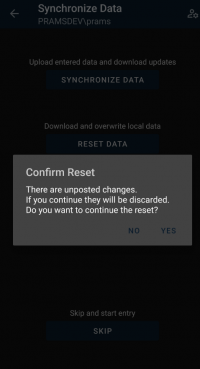
If there currently is data and you try to reset you will receive a warning to confirm the reset.
If 'Yes' is selected then the current data on the phones database will be erased and the current database information on the main server will be pulled down.
If 'No' is selected you will be returned to the sync screen.
Once the data starts the reset process, after a brief loading screen, you will be sent to the 'Routes' screen.
Daily Sync Process
The rinse and repeat routine of the sync process goes as such and should be done daily:
- Reset Data - Do this before entry to assure the database is up-to-date with any data another pumper or office user may have entered. Doing so will save time in the long run.
- Enter Data - Enter as much data as needed throughout the day.
- Synchronize Data - This step will assure that your data goes to the main database and that everyone can view the data entered for the day.
Keep in mind the last person to enter data will overwrite any other data entered.
Doing this process everyday data is needing to be entered will help keep the main office an yourself updated and alleviate any database issues on your device.
Sync Issue Troubleshooting
When syncing or entering data, if an issue occurs, please call for support at 303-904-6855 Opt.1.
If there is a significant amount of data needing to be sent do not select 'Reset Data'
Otherwise if there was little to no data entered feel free to select 'Reset Data' as this will clear most database issues. A warning will be issued if there is data and only press yes if you are 100% sure there is nothing of value to lose.
When on the phone with a Prams representative they will guide you through the following data recovery process:
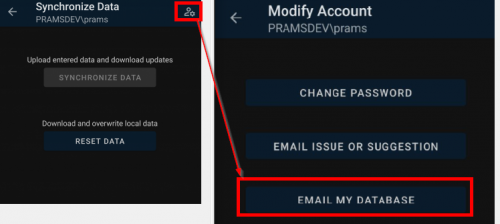
On the synchronize screen, select the cog icon at the top right.
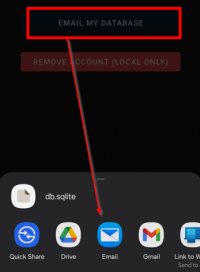
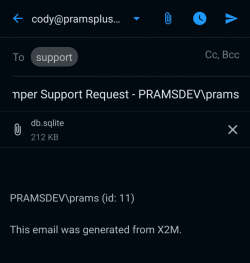
Then select 'Email My Database', a db.sqlite file will be generated.
Next select the app that you use on your phone that you use for emailing. A email will be filled out and all that's needed is to press send.
After the file is received the Prams Representative will be able to sync up your data.
After the file is successfully synced on Prams side, select 'Reset Data' and then 'Yes'. Doing so will pull down the changes and start your database fresh.
Selecting Routes and Sites
To start entering data, after selecting an account, you will arrive on the Synchronize Data screen.
If you have not started entry for the day select Reset Data to pull down the most current data otherwise press skip to go to the Routes screen.
To navigate the routes screen the following options are available:
- Back button
 to return to the previous screen
 - Spyglass button
 to search for a Route. Press the X to stop the search.
 - Date Navigation arrows
 to move between dates.
- Note you cannot go past the amount of days set for you to view and cannot edit day past the amount set. Your analyst can change these numbers if need be.
- Summary arrow
 to view the route/sites quick summary for the day.
 - Route name will take you to the sites that are available to the route.
After selecting a route you will be brought to the sites page and all the same buttons and arrows apply.
Route/Site Summary
After data has been entered for the day a quick review route/site summary can be displayed by selecting the arrow to the right of the route/site name.
To the left of the name will be a dot to signify the data entered on the route:
 - Current days data that has been entered.
 - Signifies a day prior to the current day that has been entered.
 - Show that there is an error on the route/site that needs to be fixed before being able to be synced.
Site Data Entry
After picking a site the Data Entry screen will appear.
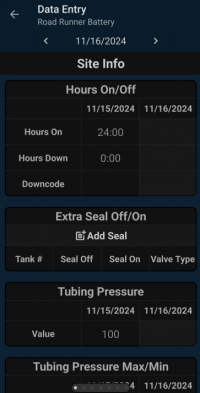
The very top of the screen will show you what site you are on and what date you are currently entering for.
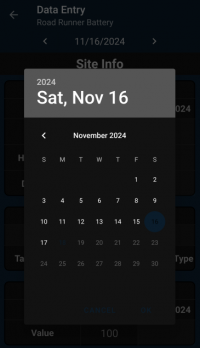
Use the arrows by the date to navigate forwards or backwards between dates. Alternatively selecting the date will bring up the calendar allowing for a quicker way to select a date of entry.
To navigate between site info products and any other page in the Data Entry section swipe left or right.
When finished either select the back arrow at the top left, the back button on your phone, or on the Summary page select the 'Back to Site List' button.
Site Info
After a site has been selected, the first page on Data Entry will be the site page.
The amount of fields requiring entry can change depending on the layout required by the Analyst.
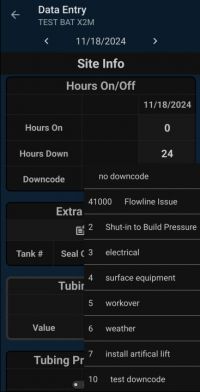
Down codes
When hours down are present a down code will be required.
If the down code you are looking for is not present please let your analyst know as they can add to the list. You will receive the changes after the next sync or reset.
The list can be scrolled through if there are more codes than what the screen allows.
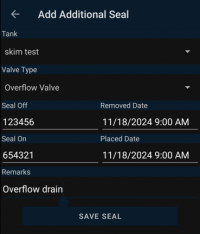
Extra Seal Off/On
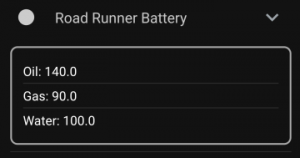
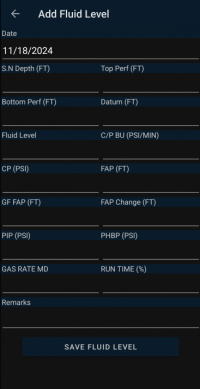
Fluid level
Oil
Gas
Water
Daily Test
Diary
Summary
Copyright © 2026 by PRAMS Plus LLC. All Rights Reserved.
